 PhpMyAdmin is a popular web-based application used for managing MySQL databases in your web hosting server. It provides a user-friendly interface for creating and managing databases, tables, and other database objects. One important aspect of database management is setting the correct collation for your database. Collation determines how the database will sort and compare characters. In this article, we will discuss how to change the database collation in PhpMyAdmin.
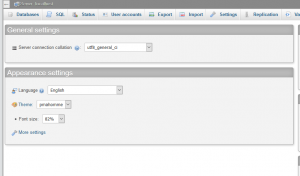
Step 1: Log in to PhpMyAdmin
To change the database collation in PhpMyAdmin, you must first log in to the PhpMyAdmin web interface. You can do this by navigating to your PhpMyAdmin URL in your web browser. The URL will typically be in the following format:
http://yourdomain.com/phpmyadmin
Once you have entered the URL, you will be prompted to enter your MySQL username and password. After entering the correct login credentials, you will be logged in to the PhpMyAdmin dashboard.
Step 2: Select the Database
After logging in to PhpMyAdmin, you will see a list of databases on the left-hand side of the screen. Select the database for which you want to change the collation. Click on the database name to expand it and see its tables.
Step 3: Select the Table(s)
After selecting the database, you will see a list of tables in that database. Select the table(s) for which you want to change the collation. You can select multiple tables by holding down the Ctrl key (or the Command key on a Mac) and clicking on the tables.
Step 4: Open the Operations Tab
Once you have selected the table(s), click on the Operations tab at the top of the screen. This will open a screen where you can change various settings for the selected table(s).
Step 5: Change the Collation
In the Operations tab, you will see a section called Table options. In this section, you can change the collation for the selected table(s). Under the Collation heading, you will see a drop-down menu where you can select the desired collation. PhpMyAdmin provides a wide range of collations to choose from, so make sure to select the one that best suits your needs.
Step 6: Save the Changes
After selecting the desired collation, click on the Go button at the bottom of the screen to save the changes. PhpMyAdmin will update the collation for the selected table(s).
Step 7: Verify the Changes
To verify that the collation has been changed successfully, you can go back to the database structure and check the collation of the selected table(s). The collation should now be the one that you selected in Step 5.
Conclusion
Changing the database collation in PhpMyAdmin is a straightforward process that can be done in just a few simple steps. By following the steps outlined in this article, you can change the collation for one or more tables in your database. Keep in mind that changing the collation may affect the way that the database sorts and compares characters, so make sure to select the collation that best suits your needs. By taking the time to properly configure your database collation, you can ensure that your database is running smoothly and efficiently.