 phpMyAdmin is a popular web-based tool that allows you to manage your MySQL or MariaDB databases. It provides an easy-to-use interface for creating and managing databases, tables, and users. In this tutorial, we will show you how to install phpMyAdmin on CentOS 7.
Step 1: Install Apache and PHP
Before you can install phpMyAdmin, you need to install Apache and PHP on your CentOS 7 server. You can do this by running the following command in your terminal:
sudo yum install httpd php
This will install Apache and PHP on your server.
Step 2: Install MySQL or MariaDB
phpMyAdmin requires a MySQL or MariaDB server to function. If you do not already have MySQL or MariaDB installed, you can install it by running the following command:
sudo yum install mariadb-server
This will install MariaDB on your server. If you prefer to use MySQL, you can install it by running the following command:
sudo yum install mysql-server
Step 3: Secure your MySQL or MariaDB installation
Before you can use MySQL or MariaDB, you need to secure your installation. You can do this by running the following command:
sudo mysql_secure_installation
This will prompt you to set a root password, remove anonymous users, disallow remote root login, and remove the test database. Follow the prompts to secure your installation.
Step 4: Install phpMyAdmin
Once you have Apache, PHP, and MySQL or MariaDB installed, you can install phpMyAdmin by running the following command:
sudo yum install phpmyadmin
This will install phpMyAdmin and its dependencies on your server.
Step 5: Configure phpMyAdmin
After installing phpMyAdmin, you need to configure it to work with your MySQL or MariaDB server. To do this, open the phpMyAdmin configuration file in your favorite text editor:
sudo nano /etc/httpd/conf.d/phpMyAdmin.conf
Locate the following lines:
# Order Deny,Allow
# Deny from All
# Allow from 127.0.0.1
Comment out these lines by adding a “#” symbol at the beginning of each line, like this:
# # Order Deny,Allow
# # Deny from All
# # Allow from 127.0.0.1
Add the following lines below the commented lines:
Require all granted
Save and exit the file.
Step 6: Restart Apache
After making changes to the Apache configuration, you need to restart Apache for the changes to take effect. You can do this by running the following command:
sudo systemctl restart httpd
Step 7: Access phpMyAdmin
Now that phpMyAdmin is installed and configured, you can access it by opening a web browser and navigating to:
http://your-server-ip/phpmyadmin
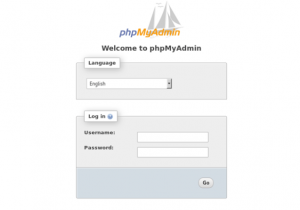
Replace “your-server-ip” with the IP address of your server. You should see the phpMyAdmin login screen.
Step 8: Login to phpMyAdmin
To log in to phpMyAdmin, enter your MySQL or MariaDB username and password. If you have not created a MySQL or MariaDB user yet, you can do so by logging in to MySQL or MariaDB and running the following command:
CREATE USER ‘your-username’@’localhost’ IDENTIFIED BY ‘your-password’;
GRANT ALL PRIVILEGES ON *.* TO ‘your-username’@’localhost’ WITH GRANT OPTION;
Replace “your-username” and “your-password” with the desired username and password. Once you have created a user, you can log in to phpMyAdmin using those credentials.
Step 9: Begin using phpMyAdmin
After logging in to phpMyAdmin, you should see the main interface, which provides you with a number of tools for managing your MySQL or MariaDB databases. You can use the left-hand navigation menu to create and manage databases, tables, and users. You can also use the top menu to execute SQL queries, import and export data, and more.
Conclusion
In this tutorial, we have shown you how to install phpMyAdmin on CentOS 7. By following these steps, you can quickly and easily set up a web-based interface for managing your MySQL or MariaDB databases. With phpMyAdmin, you can create and manage databases, tables, and users, execute SQL queries, and more, all from within your web browser. If you have any questions or run into any issues, be sure to consult the phpMyAdmin documentation or seek help from our web hosting forum.